
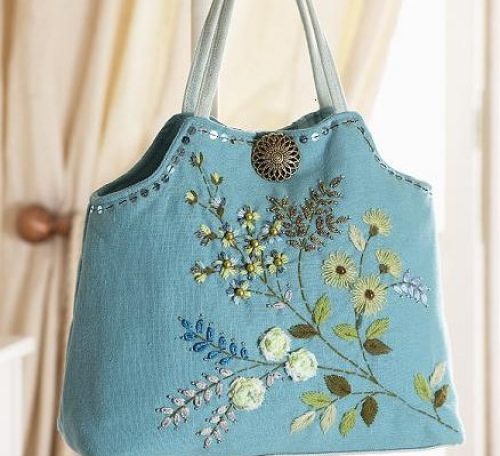
This great Forest Blooms bag project has kindly been provided by Search Press and is from their book 20 Floral Bags to Make by Susan Cariello.
This elegant, aqua blue linen bag is embroidered with an array of fine, green woollen yarns – from the fairest of fern greens, through to avocado, grass green and rich olive – mixed with sparkling sepia, turquoise blue and taupe rayon fibres. The bag is finished with large, pearlised, apple green and chocolate brown beads, flat, aqua sequins and an antique gold filigree button. The zesty colour palette balances the delicate embroidery beautifully.
Click to download the materials list, template and embroidery instructions then follow the step by step instructions below to make this beautiful embroidered bag.
You can find the project instructions in printable pdf form here.
Bag with base and shaped top
This is a glamorous style of bag that will look fabulous on your arm on any occasion. It’s also very practical, as the square base means that it’ll easily hold everything you need.
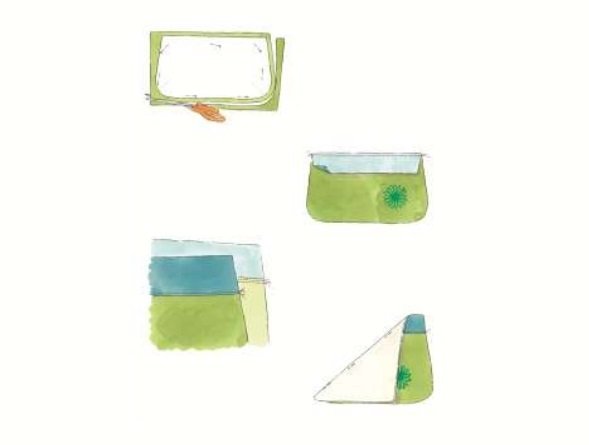
Bag exterior
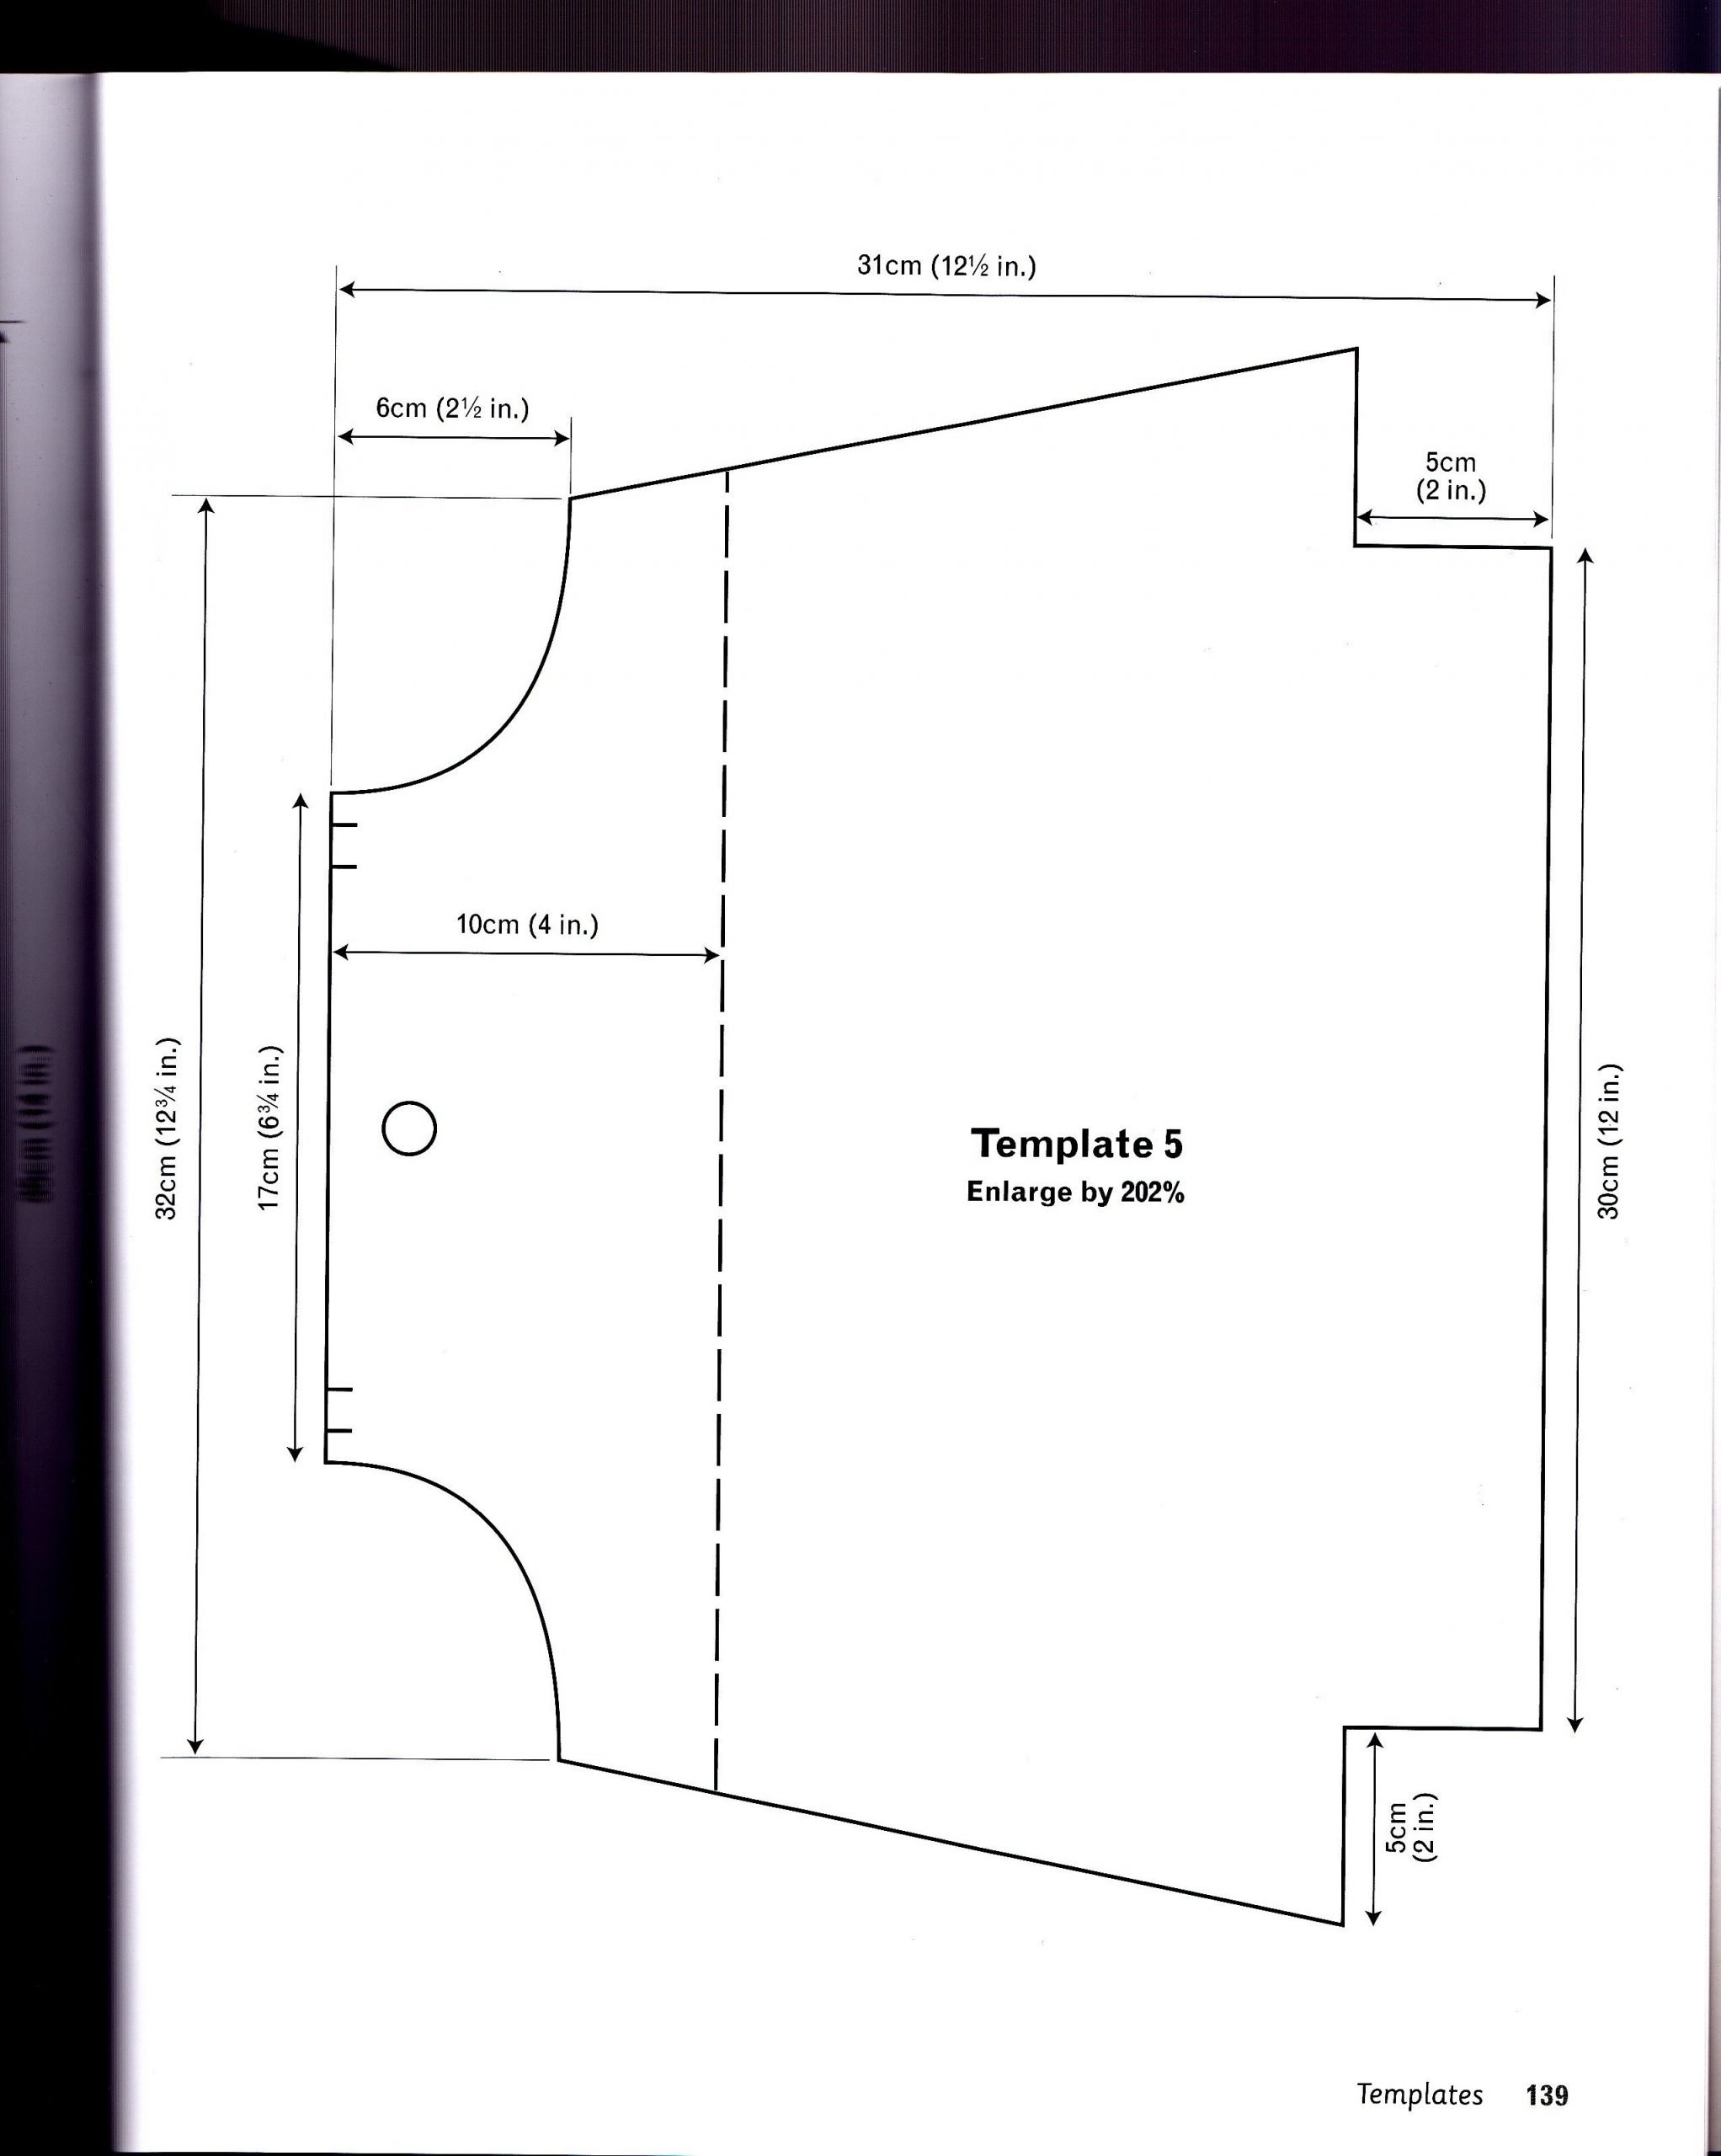
1 Enlarge Template 5 by 202 per cent. Pin the template to the embroidered fabric. Add 1cm (3⁄8 in.) seam allowances and cut out the shape using fabric scissors. Cut a bag back from plain fabric.
2 Cut the bag template along the horizontal dashed line: we’ll refer to the small top section as A and the larger bottom section as B. Pin template B to the embroidered fabric. There will already be an outline drawn before you started the embroidery, so match this carefully to the template. Add 1cm (3⁄8 in.) all around for seam allowances and cut out the shape using fabric scissors. Cut out the back of the bag using the same template and plain fabric.
3 Using the same template and adding seam allowances as for the embroidered fabric, cut out two pieces of interlining. Right side out, pin the bag front to one of the pieces of interlining: from this stage on, treat these two layers as one piece.
Pin the bag back to the other piece of interlining and treat these layers as one piece also.
4 Right sides together, pin the front and back pieces together down the sides and across the base, leaving open the inward corners at the bottom and the curved edge at the top. Set the sewing machine to a medium straight stitch. Taking a 1cm (3⁄8 in.) seam allowance, sew the side and base seams.
5 Flatten each inset corner so that the side seam touches the base seam and pin. Using the sewing machine and taking a 1cm (3⁄8 in.) seam allowance, sew across each corner. Make two lines of stitching for strength.
6 Referring to the template, lightly mark the handle positions on the front top edge of the bag with a pencil. Do the same on the back of the bag.
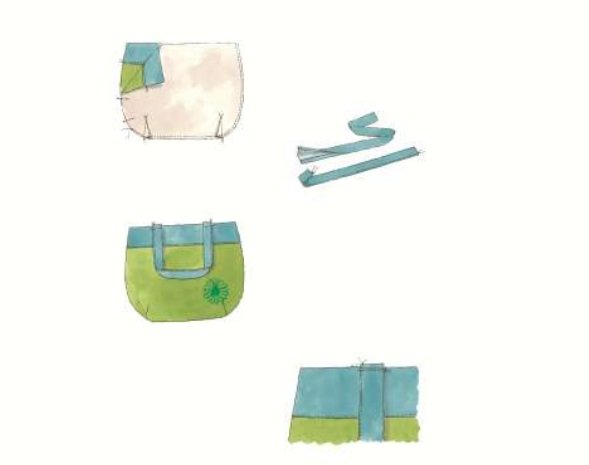
Folded handles
1 Pin the fabric handle pieces to the appropriate pieces of interfacing: from this stage on, treat these two layers as one piece.
2 Along the long sides of each strip, press 1cm (3⁄8 in.) towards the middle. Then fold the strip in half (so the raw edges are concealed) and press again.
3 Set the sewing machine to a medium straight stitch. Using a matching thread, topstitch close to the long open edge of each handle.
4 Trim each end of both handles, making sure they are the same length.
5 Pin the ends of one handle to the right side of the bag front, matching them with the markings from the template. Make sure the handle seam is facing towards the bag side seams on both sides and that the handle is not twisted. Pin the other handle to the back of the bag in the same way.
6 Sew each end of each handle in place, stitching 1cm (3⁄8 in.) from the raw edge. Sew backwards and forwards over each end a few times to make sure each handle is firmly secured.
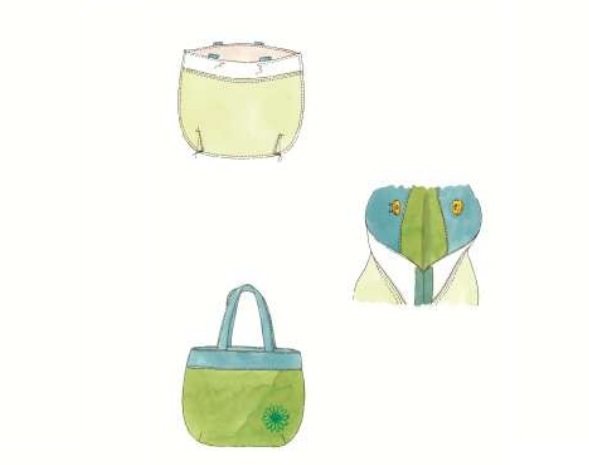
Bag lining
Cut along the dotted line on the template: the top section is for the facing and the
bottom section for the lining.
1 Pin template A to the facing fabric and cut out the shape twice, adding 1cm (3⁄8 in.) all around for seam allowances. Using the same template, cut out two pieces of interfacing, again adding 1cm (3⁄8 in.) all around. Right side out, pin the facing pieces to the interfacing pieces and from this stage on treat these two layers as one piece.
2 Pin template B to the lining fabric and cut out the shape twice, again adding 1cm (3⁄8 in.) all around for seam allowances.
3 With right sides together, pin the bottom edge of one facing to the top edge of one lining. Set the sewing machine to a medium straight stitch and sew the pieces together. Press and topstitch the seam as for step 5 of Bag Exterior. Repeat the process with the other facing and lining pieces.
4 Sew the front and back together and make the square corners as for steps 3–4 of Bag Exterior.
5 Referring to the template, mark the position of the magnetic clasp on the right side of one facing. Using a craft knife, carefully cut two small slits, just large enough to insert the prongs of the clasp. Insert the prongs into the slits then, following the manufacturer’s instructions, slip the retaining disc over the prongs and ensure it is flush against the fabric. Bend the prongs over to hold that side of the clasp in place.
6 Snap the free side of the clasp onto the side attached to a facing. Press the exposed prongs against the opposite facing and mark their position. Separate the clasp and attach the free side to the opposite facing at the marked points, in the same way as before. This process will make sure the clasp is aligned accurately on both sides.
Finishing
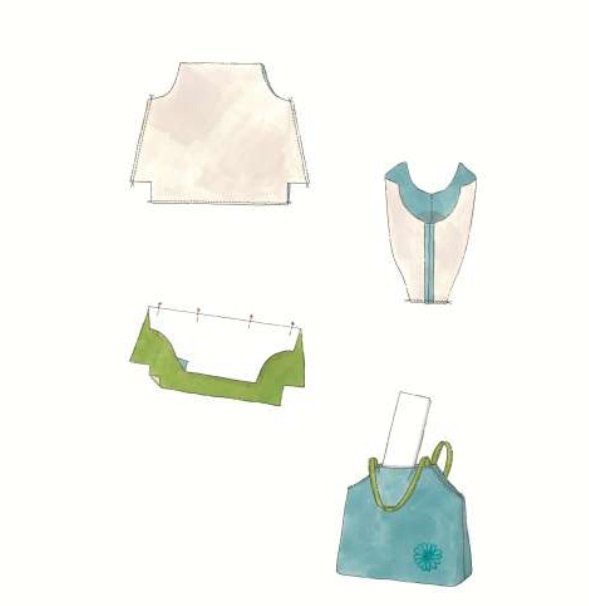
1 With right sides facing, put the embroidered bag exterior inside the bag lining, matching the side seams and top raw edges. Make sure the handles are pushed down between the two layers. Pin the bag exterior and bag lining together around the top edge.
2 Set the sewing machine to a medium straight stitch. Taking a 1cm (3⁄8 in.) seam allowance, sew around the top edge leaving an opening between the handles at the back of the bag.
3 Turn the whole bag right side out through the gap in the top edge, pulling out the handles and then pushing the lining down inside the bag. Turn in the seam allowances across the gap between the handles.
4 Measure, cut out, then carefully insert the buckram base section through the opening between the handles. Make sure you push the base right into the corners at the bottom of the bag.
5 Turn in the seam allowances across the gap between the handles. Using a matching thread, topstitch around the top edge of the bag, sewing across the gap to close it.
Now your beautiful bag is finished and ready to use.
Find other free bag patterns in our free projects section.